
- 버전문제로 이것저것 삭제하면서 다시 재설치하려고 했는데 재부팅해도 자꾸 재부팅 하라고 뜸
결론: 포멧 전에 윈도우 업데이트 해보기!
- 버전문제로 이것저것 삭제하면서 다시 재설치하려고 했는데 재부팅해도 자꾸 재부팅 하라고 뜸
import numpy as np
A = np.arange(4)
B = A.reshape((2, 2))
C = B.flatten()

print(A, '\n')
print(B, '\n')
print(C, '\n')
A = np.arange(4)
B = A.reshape((2, 2))
C = B.ravel()

print(A, '\n')
print(B, '\n')
print(C, '\n')
a = np.arange(5)
b = a.view()

b[0] = 10

print(a)
print(b)
a = np.arange(5)
b = a[:3]

b[0] = 10

print(a)
print(b)
a = np.arange(5)
b = a.copy()

b[0] = 10

print(a)
print(b)
a = np.arange(5)
b = a.copy()
c = a.view()
d = a[:3]

print(b.base is a)
print(c.base is a)
print(d.base is a)
a = np.arange(4)
b = np.reshape(a, (2, 2))
b[0, 0] = 10

print(b.base is a, '\n')
print(a, '\n')
print(b)
a = np.arange(4)
b = np.resize(a, (2, 2))
b[0, 0] = 10

print(b.base is a, '\n')
print(a, '\n')
print(b)
a = np.arange(4)
b = np.reshape(a, (2,2)).copy() # 이렇게 쓰면 원본 영향없음

b[0,0] = 10

print(b.base is a, '\n')
print(a, '\n')
print(b)
a = np.random.randint(0, 10, (3,3))
b = a.ravel()
b[0] = 10

print(b.base is a, '\n')
print(a, '\n')
print(b)
a = np.random.randint(0, 10, (3,3))
b = a.flatten()
b[0] = 10

print(b.base is a, '\n')
print(a, '\n')
print(b)
| np.reshape, np.resize 차이점 (0) | 2021.03.30 |
|---|---|
| ndim, shape, size (0) | 2021.03.29 |
| linspace와 arange 차이점, random.randn, random.normal, random.uniform, random.randint (0) | 2021.03.29 |
import numpy as np
a = np.arange(10)
b = np.reshape(a, (2, 5))
c = a.reshape((2, 5))

print('a:\n', a)
print('b:\n', b)
print('c:\n', c)
a = np.arange(10)

b = a.reshape((2, -1)) # row가 강조되는 느낌
c = a.reshape((5, -1))

print(b.shape)
print(c.shape)
a = np.arange(10)

b = np.resize(a, (2, 5))

print('a:\n', a)
print('b:\n', b)
a = np.arange(5)

b = np.reshape(a, (10,))
print('b:\n', b)
a = np.arange(5)

b = np.resize(a, (10,))
print('b:\n', b)
# 앞에서부터 반복해서 만듦
a = np.arange(4)

b = a.resize((2, 2))

print('a: \n', a)
print('b:\n', b)
a = np.arange(5)

a.resize((2,2))
print(a)
a = np.arange(5)

a.reshape((2,2))
print(a)
| np.reshape, np.resize 차이점2, flatten, ravel, copy, view (0) | 2021.03.30 |
|---|---|
| ndim, shape, size (0) | 2021.03.29 |
| linspace와 arange 차이점, random.randn, random.normal, random.uniform, random.randint (0) | 2021.03.29 |
np.ndim -> 차원
np.shape -> row, column 확인
np.size -> 개수
.dtype -> 데이터 타입확인 ex) int64, float64
-> 데이터 타입 명시적으로 설정 가능
int8_np = np.array([1, 2, 3], dtype=np.int8) : 데이터 타입 int8이 됨
.itemsize ->넘파이 array에 많은 값이 있을 떄 값들이 각각 몇 바이트인지 숫자로 표현, 원소1개 용량 표현
.nbytes -> 넘파이 array의 원소들이 차지하는 용량을 담고 있는 데이터
-> size*itemsize 와 같음
| np.reshape, np.resize 차이점2, flatten, ravel, copy, view (0) | 2021.03.30 |
|---|---|
| np.reshape, np.resize 차이점 (0) | 2021.03.30 |
| linspace와 arange 차이점, random.randn, random.normal, random.uniform, random.randint (0) | 2021.03.29 |
: 수치를 다루는데 특화됨, 넘파이가 제공하는 기능을 사용하기 위해
* object란?
- object = data + methods
- 파이썬에서는 모든 것이 object(객체)다.
- 변수선언하는 것도 다 object
- object를 만드는 과정 -> instantiation
- dir() -> 기능 확인
- type() -> 타입 확인
- np.array()
- np.zeros(shape=(a,b)) -> 0으로 채운 (a,b)
- np.ones(shape=(a,b)) -> 1로 채운 (a,b)
- np.full(shape=(a,b), fill_value=x) -> x값으로 (a,b)형태로 만듦.
- np.empty(shape=(a,b)) -> 공간 만든다고 생각 ( 쓰레기 값 들어감), 나중에 값 채울 때 주로 사용
- np.zeros_like(M) -> M과 shape 같음, 0으로 채움
- np.ones_lke(M) -> M과 shape 같음, 1로 채움
- np.full_like(M, fill_value=x) -> M과 shape 같음, x로 값채움
- np.empty_like(M) -> M과 shape같음, 쓰레기값 들어감
* 파이썬에서 range() 는 소수점을 사용하면 에러가 나지만 넘파이에서는 arange 쓸 때 소수점 가능함
: 같은 결과를 만들 수 있음
print(np.arange(0, 1+0.25, 0.25))
print(np.linspace(0, 1, 5))
결과는 [0. 0.25 0.5 0.75 1. ] 으로 동일함
- np.linspace(start, stop, num=50 ...)
: 처음값과 끝값을 포함
: 몇 개로 만들지, -> 개수 강조할 때 사용하면 코드 가독성 †
- np.arange([start], stop, [step] ...), [] 생략가능
: 끝값 포함하지 않음
: 범위, step -> 구간, 간격 강조할 때 사용하면 코드 가독성 †
- random.randn(d0, d1, ..., dn) -> 차원값
: 표준정규분포: 평균이 0이고 표준편차가 1인 것
: 균등하게 샘플링 함
-random.normal(loc=0.0, scale=1.0, size=None)
: loc=평균, scale=표준편차
-random.uniform(low=0.0, high=1.0, size=None)
: 범위 지정가능
-random.randint(low, high=None, size=None, dtype=int)
: high 숫자 포함하지 않음
: int형태로 출력됨
| np.reshape, np.resize 차이점2, flatten, ravel, copy, view (0) | 2021.03.30 |
|---|---|
| np.reshape, np.resize 차이점 (0) | 2021.03.30 |
| ndim, shape, size (0) | 2021.03.29 |
git 설치 후1


실행


- 바탕화면에 했음, ls 하면 확인가능
git clone git clone https://github.com/OKJINHAE/study.git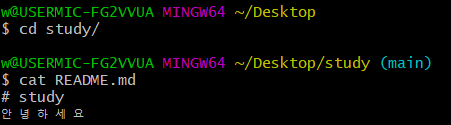


하고 다시


- 깃허브에서 수정하고

commit을 하면 반드시 git bash에서 git pull을 해줘야 함
그러면 컴퓨터에서도 파일이 수정됨
dschloe.github.io/settings/hexo_blog/
Hexo Blog 만들기
개요 간단하게 Hexo 블로그를 만들어 본다. I. 필수 파일 설치 1단계: nodejs.org 다운로드 설치가 완료 되었다면 간단하게 확인해본다. $ node -v 2단계: git-scm.com 다운로드 설치가 완료 되었다면 간단하
dschloe.github.io
[Python 재무제표 크롤링 #4] Requests, BeautifulSoup로 크롤링(Crawling), 데이터 추출하기(Data Extraction) - 1
| Requests, BeautifulSoup 라이브러리 Requests는 웹상의 html문서를 파이썬 언어를 통해 쉽게 사용자 컴퓨터로 가져올 수 있게 하는 라이브러리입니다. 그리고 BeautifulSoup는 가져온 HTML문서를 파싱하여
engkimbs.tistory.com
- flask 로 프로젝트 만들기

-터미널에서 설치
pip install requests
pip install bs4
일단 간단하게 만들어놓기
<!DOCTYPE html>
<html lang="en">
<head>
    <meta charset="UTF-8">
    <title>Title</title>
</head>
<body>
    데이터 수집중

</body>
</html>
-app.py
import requests
from bs4 import BeautifulSoup
from flask import Flask, render_template

app = Flask(__name__)

url = 'https://movie.naver.com/movie/running/current.nhn' #네이버영화 주소


@app.route('/')
def data_gathering():
    response = requests.get(url)
    soup = BeautifulSoup(response.content, 'html.parser')
    print(soup.prettify())

    return render_template('data_gathering.html')


if __name__ == '__main__':
    app.run()
- 영화 포스터 이미지 클릭해서


-app.py
import requests
from bs4 import BeautifulSoup
from flask import Flask, render_template

app = Flask(__name__)

url = 'https://movie.naver.com/movie/running/current.nhn' #네이버영화 주소


@app.route('/')
def data_gathering():
    response = requests.get(url)
    soup = BeautifulSoup(response.content, 'html.parser')
    #print(soup.prettify())

    ul = soup.find('ul', class_="lst_detail_t1")
    print(ul)

    return render_template('data_gathering.html')


if __name__ == '__main__':
    app.run()
-> lst_detail_t1 부분만 나옴 ( 클릭된 곳만)
- 이미지 가져오기

import requests
from bs4 import BeautifulSoup
from flask import Flask, render_template

app = Flask(__name__)

url = 'https://movie.naver.com/movie/running/current.nhn' #네이버영화 주소


@app.route('/')
def data_gathering():
    response = requests.get(url)
    soup = BeautifulSoup(response.content, 'html.parser')
    #print(soup.prettify())

    ul = soup.find('ul', class_="lst_detail_t1")
    img = ul.select('li > div > a > img')
    print(len(img))
    for i in img:
        print(i.get('src'))

    return render_template('data_gathering.html')


if __name__ == '__main__':
    app.run()

- 전체 관람가 가져오기


    rating = ul.select('li > dl > dt > span')
    for rate in rating:
        print(rate.text)
-app.py
import requests
from bs4 import BeautifulSoup
from flask import Flask, render_template

app = Flask(__name__)

url = 'https://movie.naver.com/movie/running/current.nhn' #네이버영화 주소


@app.route('/')
def data_gathering():
    response = requests.get(url)
    soup = BeautifulSoup(response.content, 'html.parser')
    #print(soup.prettify())

    ul = soup.find('ul', class_="lst_detail_t1")
    img = ul.select('li > div > a > img')

    rating = ul.select('li > dl > dt > span')
    for rate in rating:
        print(rate.text)

    return render_template('data_gathering.html')


if __name__ == '__main__':
    app.run()

- 영화제목 가져오기


    movie_names = ul.select('li > dl > dt > a')
    for movie_name in movie_names:
        print(movie_name.text)
import requests
from bs4 import BeautifulSoup
from flask import Flask, render_template
app = Flask(__name__)
url = 'https://movie.naver.com/movie/running/current.nhn' #네이버영화 주소
@app.route('/')
def data_gathering():
response = requests.get(url)
soup = BeautifulSoup(response.content, 'html.parser')
#print(soup.prettify())
ul = soup.find('ul', class_="lst_detail_t1")
img = ul.select('li > div > a > img')
movie_names = ul.select('li > dl > dt > a')
for movie_name in movie_names:
print(movie_name.text)
return render_template('data_gathering.html')
if __name__ == '__main__':
app.run()

- 네티즌 글자 가져오기

#content > div.article > div:nth-child(1) > div.lst_wrap > ul > li:nth-child(1) > dl > dd.star > dl.info_star > dt- 이것만 가져오기
dl > dd.star > dl.info_star > dt
    estimate_poeple = ul.select('dl > dd.star > dl.info_star > dt')
    for estimated_p in estimate_poeple:
        print(estimated_p.text)
- app.py
import requests
from bs4 import BeautifulSoup
from flask import Flask, render_template

app = Flask(__name__)

url = 'https://movie.naver.com/movie/running/current.nhn' #네이버영화 주소


@app.route('/')
def data_gathering():
    response = requests.get(url)
    soup = BeautifulSoup(response.content, 'html.parser')

    ul = soup.find('ul', class_="lst_detail_t1")
    #print(ul)
    img = ul.select('li > div > a > img')
    # print(len(img))

    estimate_poeple = ul.select('dl > dd.star > dl.info_star > dt')
    for estimated_p in estimate_poeple:
        print(estimated_p.text)

    return render_template('data_gathering.html')


if __name__ == '__main__':
    app.run()
- 평점 가져오기


#content > div.article > div:nth-child(1) > div.lst_wrap > ul > li:nth-child(1) > dl > dd.star > dl.info_star > dd > div > a > span.num- 위에 copy한 것 중에서 아래만 가져오기 (그 위에는 ul로 이미 가져와져있어서)
dl > dd.star > dl.info_star > dd > div > a > span.num- app.py
import requests
from bs4 import BeautifulSoup
from flask import Flask, render_template

app = Flask(__name__)

url = 'https://movie.naver.com/movie/running/current.nhn' #네이버영화 주소


@app.route('/')
def data_gathering():
    response = requests.get(url)
    soup = BeautifulSoup(response.content, 'html.parser')
    ul = soup.find('ul', class_="lst_detail_t1")

    estimate_scores = ul.select('dl > dd.star > dl.info_star > dd > div > a > span.num')
    for estimate_score in estimate_scores:
        print(estimate_score.text)

    return render_template('data_gathering.html')


if __name__ == '__main__':
    app.run()

- 참여 인원 가져오기


#content > div.article > div:nth-child(1) > div.lst_wrap > ul > li:nth-child(1) > dl > dd.star > dl.info_star > dd > div > a > span.num2 > em여기서 가져와 쓰기
dl > dd.star > dl.info_star > dd > div > a > span.num2 > emimport requests
from bs4 import BeautifulSoup
from flask import Flask, render_template
app = Flask(__name__)
url = 'https://movie.naver.com/movie/running/current.nhn' #네이버영화 주소
@app.route('/')
def data_gathering():
response = requests.get(url)
soup = BeautifulSoup(response.content, 'html.parser')
#print(soup.prettify())
ul = soup.find('ul', class_="lst_detail_t1")
img = ul.select('li > div > a > img')
number_of_participants = \
ul.select('dl > dd.star > dl.info_star > dd > div > a > span.num2 > em')
for number_of_participant in number_of_participants:
print(number_of_participant.text)
return render_template('data_gathering.html')
if __name__ == '__main__':
app.run()

지금까지 했던 것들 list로 만들기
app.py
import requests
from bs4 import BeautifulSoup
from flask import Flask, render_template

app = Flask(__name__)

url = 'https://movie.naver.com/movie/running/current.nhn'


@app.route('/')
def data_gathering():
    img_list = []
    rating_list = []
    movie_name_list = []
    estimated_people_list = []
    estimate_scores_list = []
    number_of_participants_list = []

    response = requests.get(url)
    soup = BeautifulSoup(response.content, 'html.parser')
    # print(soup.prettify())

    ul = soup.find('ul', class_="lst_detail_t1")
    img = ul.select('li > div > a > img')
    # print(len(img))
    for i in img:
        img_list.append(i.get('src'))

    rating = ul.select('li > dl > dt > span')
    for rate in rating:
        rating_list.append(rate.text)
    movie_names = ul.select('li > dl > dt > a')
    for movie_name in movie_names:
        movie_name_list.append(movie_name.text)

    estimated_people = ul.select('dl > dd.star > dl.info_star > dt')
    for estimated_p in estimated_people:
        estimated_people_list.append(estimated_p.text)

    estimate_scores = ul.select('dl > dd.star > dl.info_star > dd > div > a > span.num')
    for estimate_score in estimate_scores:
        estimate_scores_list.append(estimate_score.text)

    number_of_participants = \
        ul.select('dl > dd.star > dl.info_star > dd > div > a > span.num2 > em')
    for number_of_participant in number_of_participants:
        number_of_participants_list.append(number_of_participant.text)

    print(number_of_participants_list)
    return render_template('data_gathering.html');


if __name__ == '__main__':
    app.run()

- 감독, 배우는 여러 명이라서 리스트로 만들었음
-연령 등급은 없는 것도 있어서 리스트로 만들었음 없으면 빈 리스트로 채워짐
- app.py
import requests
from bs4 import BeautifulSoup
from flask import Flask, render_template

app = Flask(__name__)

url = 'https://movie.naver.com/movie/running/current.nhn'


@app.route('/')
def hello_world():
    response = requests.get(url)
    soup = BeautifulSoup(response.content, 'html.parser')
    ul = soup.find('ul', class_='lst_detail_t1')
    movie_list = []
    li = ul.find_all('li')
    for piece in li:
        img = piece.find('img')
        actor_list = [act.text for act in piece.select('dl > dd:nth-child(3) > dl > dd:nth-child(6) > span > a')]
        img_src = img.get('src')
        directer = [dir.text for dir in piece.select('dl > dd:nth-child(3) > dl > dd:nth-child(4) > span > a')]
        age = [ag.text for ag in piece.select('dl > dt > span')]
        movie_name = piece.select(' dl > dt > a')[0].text
        netizen = piece.select('dl > dd.star > dl > dd > div > a > span.num')[0].text
        netizen_num = piece.select('dl > dd.star > dl.info_star > dd > div > a > span.num2 > em')[0].text
        movie_list.append([img_src, age, movie_name, netizen, netizen_num, actor_list, directer])
    for Movie in movie_list:
        print(Movie)
    return render_template('data_gathering.html', Movie=movie_list)


if __name__ == '__main__':
    app.run()
- data_gathering.html
<!DOCTYPE html>
<html lang="en">
<head>
    <meta charset="UTF-8">
    <title>Title</title>
    <style>
        .flex-container {
            display: flex;
            flex-direction: row;
            margin: 20px;

            width: 400px;
            margin: 0 auto;

            box-shadow: 2px 2px 4px gray;
        }
    </style>
</head>
<body>
    {% for movie in Movie %}
      <div class="flex-container">
        <img style="width: 100px; height: 150px;" src="{{ movie[0] }}">
     <ul>
         <li>관람가 등급 : {% for i in movie[1] %} {{ i }} {% endfor %}</li>
         <li>제목 : {{ movie[2] }}</li>
         <li>평 점 : {{ movie[3] }}</li>
        <li> 감독 :
            {% for director in movie[6] %}
                {{ director }},
            {% endfor %}
         <li> 배우 :
            {% for actor in movie[5] %}
                {{ actor }},
            {% endfor %}
         </li>
     </ul>
     </div>


    {%  endfor %}
</body>
</html>
-리스트 안에 리스트 말고 class로 만들기
- app.py
import requests
from bs4 import BeautifulSoup
from flask import Flask, render_template

app = Flask(__name__)

url = 'https://movie.naver.com/movie/running/current.nhn'


@app.route('/')
def hello_world():
    response = requests.get(url)
    soup = BeautifulSoup(response.content, 'html.parser')
    ul = soup.find('ul', class_='lst_detail_t1')
    movie_list = []
    li = ul.find_all('li')
    for piece in li:
        img = piece.find('img')
        actor_list = [act.text for act in piece.select('dl > dd:nth-child(3) > dl > dd:nth-child(6) > span > a')]
        img_src = img.get('src')
        directer = [dir.text for dir in piece.select('dl > dd:nth-child(3) > dl > dd:nth-child(4) > span > a')]
        age = [ag.text for ag in piece.select('dl > dt > span')]
        movie_name = piece.select(' dl > dt > a')[0].text
        netizen = piece.select('dl > dd.star > dl > dd > div > a > span.num')[0].text
        netizen_num = piece.select('dl > dd.star > dl.info_star > dd > div > a > span.num2 > em')[0].text
        movie_list.append([img_src, age, movie_name, netizen, netizen_num, actor_list, directer])
    for Movie in movie_list:
        print(Movie)
    return render_template('data_gathering.html', Movie=movie_list)


class Book:
    def __init__(self, title, author):
        self.title = title
        self.author = author


@app.route('/study')
def study():
    book_list = []
    book = Book('제목1', '저자1')
    book_list.append(book)

    book = Book('제목2', '저자2')
    book_list.append(book)

    for b in book_list:
        print(b.title, b.author)
    return render_template('study.html', book_list=book_list)


if __name__ == '__main__':
    app.run()
-study.html
<!DOCTYPE html>
<html lang="en">
<head>
    <meta charset="UTF-8">
    <title>Title</title>
</head>
<br>
    {% for book in book_list %}
        {{ book.title }}
        <br>
        {{ book.author }}
    {% endfor %}

</body>
</html>
이런 식으로 간단해짐.
- app.py
import requests
from bs4 import BeautifulSoup
from flask import Flask, render_template

app = Flask(__name__)

url = 'https://movie.naver.com/movie/running/current.nhn'


class NaverMovie:
    def __init__(self, img_src, age, movie_name, netizen, netizen_num,\
                 actor_list, directer):
        self.img_src = img_src
        self.age = age
        self.movie_name = movie_name
        self.netizen = netizen
        self.netizen_num = netizen_num
        self.actor_list = actor_list
        self.actor_list = actor_list
        self.directer = directer


@app.route('/')
def hello_world():
    response = requests.get(url)
    soup = BeautifulSoup(response.content, 'html.parser')
    ul = soup.find('ul', class_='lst_detail_t1')
    movie_list = []
    li = ul.find_all('li')
    for piece in li:
        img = piece.find('img')
        actor_list = [act.text for act in piece.select('dl > dd:nth-child(3) > dl > dd:nth-child(6) > span > a')]
        img_src = img.get('src')
        directer = piece.select('dl > dd:nth-child(3) > dl > dd:nth-child(4) > span > a')[0].text
        age = [ag.text for ag in piece.select('dl > dt > span')]
        movie_name = piece.select(' dl > dt > a')[0].text
        netizen = piece.select('dl > dd.star > dl > dd > div > a > span.num')[0].text
        netizen_num = piece.select('dl > dd.star > dl.info_star > dd > div > a > span.num2 > em')[0].text
        naverMovie = NaverMovie(img_src, age, movie_name, netizen, netizen_num, actor_list, directer)
        movie_list.append(naverMovie)
        #movie_list.append([img_src, age, movie_name, netizen, netizen_num, actor_list, directer])
    for Movie in movie_list:
        print(Movie)
    return render_template('data_gathering.html', movie_list=movie_list)


class Book:
    def __init__(self, title, author):
        self.title = title
        self.author = author


@app.route('/study')
def study():
    book_list = []
    book = Book('제목1', '저자1')
    book_list.append(book)

    book = Book('제목2', '저자2')
    book_list.append(book)

    for b in book_list:
        print(b.title, b.author)

    return render_template('study.html', book_list=book_list)


if __name__ == '__main__':
    app.run()
- data_gathering.html
<!DOCTYPE html>
<html lang="en">
<head>
    <meta charset="UTF-8">
    <title>Title</title>
    <style>
        .flex-container {
            display: flex;
            flex-direction: row;
            margin: 20px;

            width: 400px;
            margin: 0 auto;

            box-shadow: 2px 2px 4px gray;
        }
    </style>
</head>
<body>
    {% for movie in movie_list %}
      <div class="flex-container">
        <img style="width: 100px; height: 150px;" src="{{ movie.img_src }}">
     <ul>
         <li>관람가 등급 : {% for i in movie.age %} {{ i }} {% endfor %}</li>
         <li>제목 : {{ movie.movie_name }}</li>
         <li>평 점 : {{ movie.netizen }}</li>
         <li>감독 : {{ movie.directer }}</li>
         <li> 배우 :
            {% for actor in movie.actor_list %}
                {{ actor }},
            {% endfor %}
         </li>
     </ul>
     </div>


    {%  endfor %}
</body>
</html>
* a = [1]
print(a) -> [1] 로 되니까 .text가 안됨
그래서 print(a[0]) -> 1 이렇게 값만 뽑은거


- apply 하기

- mysql 접속


call my_procedure();
- 외부에서 불러서 in 여기다 넣는데 데이터 형식은 int, 이름은 s다
x값 외부에서 받아서 sql문으로 +1하기


- out ->mysql에서 클라이언트로 x를 주겠다

SET: OUT되는 x에 3을 넣음


- 모델링해서 저장해두기
forward engineering 순공학
reverse enginnering 역공학
- 기존에 있던 bookstore 삭제


그러고 홈 누르고 다시 들어오면 bookstore 있음
- join


-- use company;
select e.sabun, e.name, d.name from employee e
	inner join dept d
on e.dept_id = d.dept_id; 
| 네이버 영화 크롤링 (0) | 2021.01.28 |
|---|---|
| 로또 웹 (0) | 2021.01.27 |
| mysql - python 연동 (0) | 2021.01.26 |
| mysql (0) | 2021.01.25 |
| flex box (0) | 2021.01.25 |